Create Control Templates
Add New Controls
- Click
 Expand to view the Controls section on the main Risk and Control template screen.
 - Click
 Add in the Controls section to link controls to this process through in-line editing or click Add to open the Control form in a separate window.
Note: See In Line Editing for additional information.
In Line View

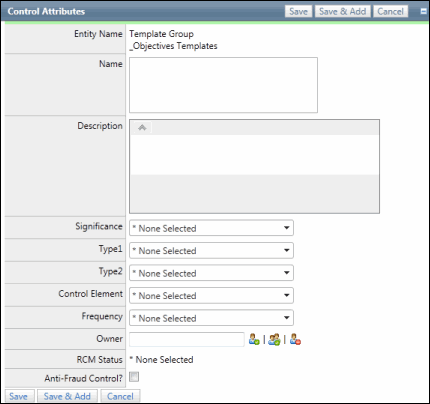
Control Form

- Enter the Control Name and Description.
Note: Do not utilize the following characters when entering information into Portal; & * % # @ ; / \ : , - or ~. .
- Select Control Type1, Control Type2, Significance, COSO Element, and Control Frequency from the drop-down values.
- Click
 Select User or
  Select User Group to choose an owner for this control
- Enter text that contains the name, email address or network ID of the user you wish to select and click Execute or click Show All.
Note: A list of users containing, (not equaling), the entered text will display in the search results.
- Click the name of the user or click Select No User to indicate the user is not required.
- Enter text that contains the name, email address or network ID of the user you wish to select and click Execute or click Show All.
- Click
 Save or Save.
Note: The controls are added to the list.
Link risks to controls
Existing risks contained within the template can be linked to a given control.
- Right-click on the control that you wish to link from the entity hierarchy, click
 Link Object and select
  Objective,
  Risk or
  Test, depending on which object you wish to link.
Note: You can also link risks and tests
 from the Control form.
 - Mark the checkboxes next to the objective, risk or test you wish to link from the list, depending on the object you selected.
Note: Click Edit Search and utilize the list search functionality to modify your selection and focus your results. Utilize List Searches for more information.
- Click Save.
Add new risks to controls
New risks can be added to a given control.
- Click the control name in the control list.
- Click Add in the Risks section.
Note: You can also click
 Add to add new risks in-line. See In Line Editing for additional information.
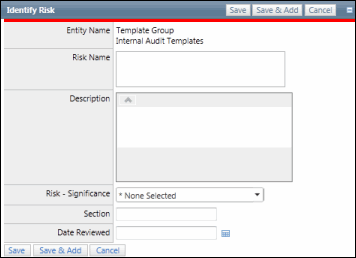
- Enter the Risk Name and Risk Description.
- Select the Risk Significance and Risk Type from the drop-down list.
- Select a Risk Event Category from the drop-down list.
- Click Save.
Note: New risks added will automatically be linked to controls from which they've been added.
Note: In the context of a project, Protiviti may introduce proprietary content.
Link tests to controls
Existing tests contained within the template can be linked to a given control.
- Click the control name in the control list.
- Click Link in the Testing Details section.
- Select the test name check box next to every test to be completed on this control.

- Click Save.
Add tests to controls
New tests can be added to a control.
- Click the control name in the control list.
- Click Add in the Testing Detail section.
Note: You can also click
 Add to add new risks in-line. See InLine Editing for additional information.
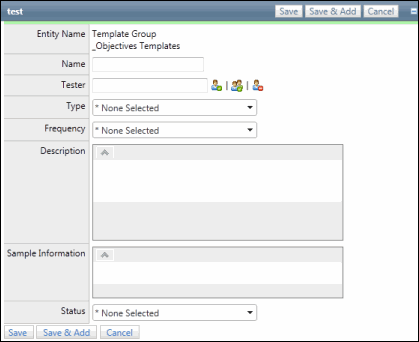
- Enter a test name, description and sample size.
- Select the test type, frequency and status from a drop-down list.
- Click
 Select User or
  Select User Group to choose a tester for this test.
- Enter text that contains the name, email address or network ID of the user you wish to select and click Execute or click Show All.
Note: A list of users containing, (not equaling), the entered text will display in the search results.
- Click the name of the user or click Select No User to indicate the user is not required.
- Enter text that contains the name, email address or network ID of the user you wish to select and click Execute or click Show All.
- Enter sample size information.
- Click Save.