|
|
|
|
Establish Project Scope
Once the project has been scheduled, the project scope can be established. Each project will focus on one or more projectable units. Projectable units include Organizations, Processes, IT Applications, Project/Events and/or custom entities. By establishing the scope, you are determining which project units/entities will be the subject of the project. The scope impacts the level, depth and type of analysis that is conducted during the project.
Note: More detailed scoping occurs within the RCMs of the primary projectable units. Within the RCM work paper team members can determine which objectives, risks and controls will be in scope for an projectable unit.
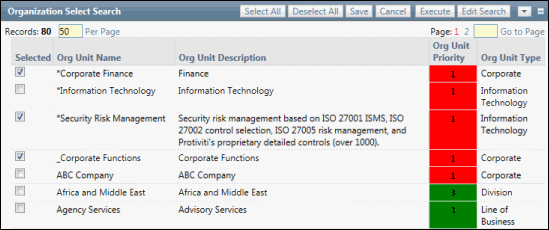
A Search functionality that utilizes key criteria fields is available to assist users in locating projectable units that should be included in the scope. (Note the key fields vary based on the type of projectable unit selected (e.g. organization, process, IT Project etc.).
 Access the Project.
- Click the Project Scope Tab. Alternatively, right-click project name-->View Modules-->Project Scope from the project hierarchy.
- From the Project Scope Hierarchy, right-click on the Scope link.
- Click
 Link Object next to the selected project and select the entity type of the object you wish to link to the project (Figure 1).
 - A search screen will appear with a list of entities for the type you selected (figure 2). Mark the checkboxes next to the entities you wish to link in the search list and click Save.
- (Optional) Click Edit Search to create, edit and execute a search to assist in locating auditable units (organizations, processes etc.) to be included in the scope of the project.
Notes:
- The object will be copied to the scope of the project instead of getting linked. A copy of the object will be maintained in the project.
- The objects in a Project scope will be retained even if the corresponding objects in the Entity Hierarchy are deleted. The scoped objects will not be deleted simultaneously.
- Each object has a unique set of default search criteria fields that will display to be used as a filter.
- The administrator may utilize the configuration functionality to change the fields that display in the scope list.
- The Team Member can copy additional RCM sub-objects into the scope of a project.
- Select the checkbox for each object you wish to include in the scope of the project.
- Click Save.
- If there are additional RCM sub-objects that are yet to be copied into the project scope after the initial scoping, they can be copied to the project scope by clicking the Import from RCM link from the project RCM Evaluation page.
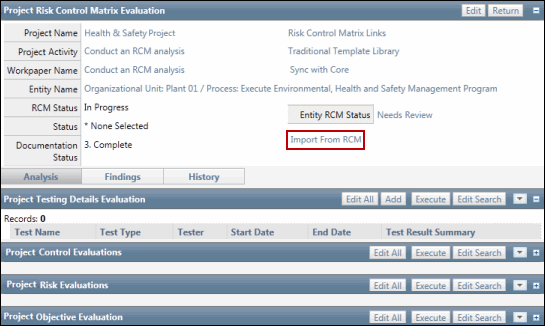
Figure 1:
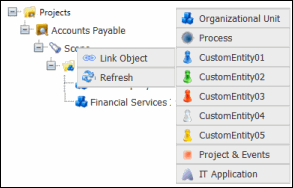
Figure 2:

Note: You can also scope objects to projects from the object via the Entity Hierarchy Tree. For more information, see Scope a Project from the Entity Hierarchy.
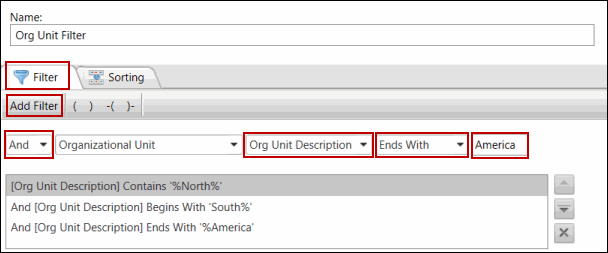
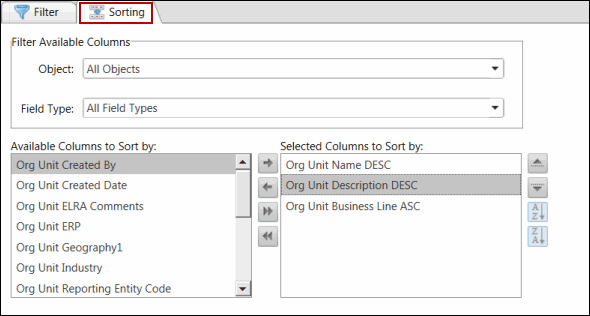
Sort Entities in the Project Scope Tab
After the project has been scoped, you can further filter the scoped entities to streamline or isolate specific information.
- Right-click the folder for the entities you want to scope from the Project Scope Hierarchy and click
 Sort.
Sort.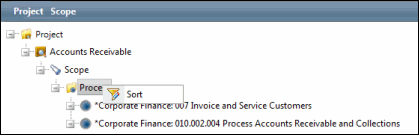
- Type a name for the filter in the Name text box.
Note:Each filter is assigned a default name.
- Customize and streamline your filter with the following tabs.
- When finished, click
 Save to save your changes,
  Run to execute the filter/sort without saving, or
  Cancel to cancel without saving.