|
|
|
|
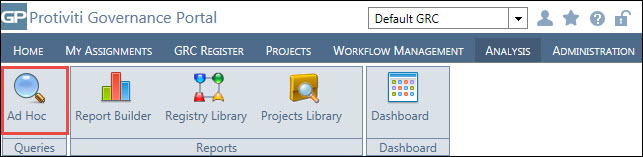
View the Search Interface
- Access the
 Search Interface.
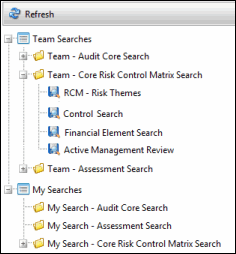
 - Expand
 the node where the search is located.
 - Expand the folder or sub folder, if necessary.
Note: The search interface contains two nodes: Team Searches and My Searches. The My Searches folder is visible only to the user concerned. The searches created by the user lies in the My Searches folder. These searches are not visible to any other user. Team Searches folder, however, contains the shared searches that are visible to all users across the Governance Portal.
- Folder Options: Right-click the folder and select from the following options:
 Add Folder: Adds a folder under the folder you selected. Type a name for the new folder, and press Enter.
 New Search: Creates a new search under the selected folder.
Note: For more information, see Create a Search.
 Delete: Deletes the selected folder. Click OK to confirm deletion.
Note: The Delete option will appear only for the user-created folders and not for the system-defined folders.
 Security: Enables administrators to apply role-based security to a folder. Once security has been administered to a particular folder, only users in these roles can view and utilize that folder. The available roles will be sorted alphabetically.
Note: The Security option is visible only for the folders under the Team Search node.
 Rename: Renames the folder. Type a new name for the folder, and press Enter.
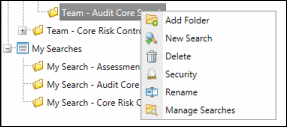
 Manage Searches: Allows you to sort and perform actions on searches from a column-view. From the Manage Searches screen, you can execute, edit, and delete the search, export to Excel or add the search to your favorites. Click on the column header to sort the searches by column.
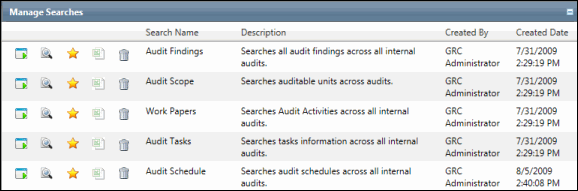
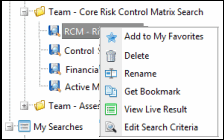
- Search Options: Right-click the search and select the following options
 Add to Favorites: Adds the search to your Favorites.
 Note: For more information, see Add a Favorite.
- Delete: Deletes the selected search. Click OK to confirm deletion.
- Rename: Renames the search. Type a new name for the search, and press Enter.
 Get Bookmark: Copies a bookmark of the selected search to your clipboard, which can be pasted into a memo field or quick link in an object form.
Note: See Bookmark a Search for more information.
 View Cached Results: Displays the cached or saved results from a scheduled search.
Note: This option will only display if the search has been scheduled to run from the Schedule tab. See Create a Search for details.
 View Live Results: Displays the current or latest results.
Note: See View Search Results for more information on viewing and manipulating your search results.
-
 Edit Search Criteria: Allows you to edit the existing search.
Note: For more information, see Edit Search Criteria.
- Execute a Search: Double-click on the selected search to run the search.
Notes:
- See View Search Results for more information on viewing and manipulating your search results.
- The search results will display live or cached/saved results depending on the option selected in the Schedule tab. For more information, see Create a Search.
- Move a Search: You can move searches between various folders by dragging and dropping searches from one folder to another.
Note: You can save an existing search from a folder under the Team Searches node as a new search in any folder under the My Searches node. The vice versa is also true. You must have the required permissions on the folder in order to move the search.