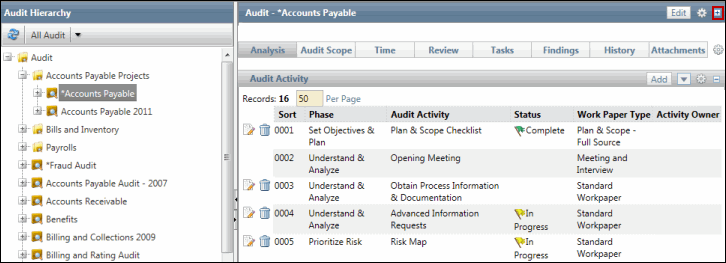
There are several ways within the Governance Portal to access work papers. The two most common paths are through the Action Items List and the Internal Audit tab. The Action Item list is the quickest and easiest way for most users.
Select the Default GRC context from the context menu.
Click the Projects tab.
Select Pending, Current, or Complete from the Execution group.
Click the project name from the project hierarchy tree.
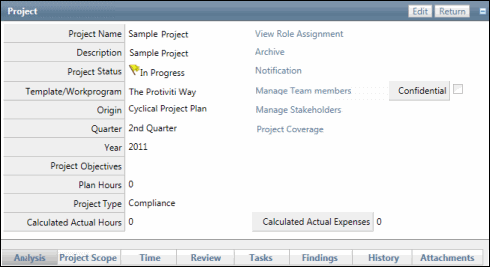
Click Expand in the Project section to view the project attributes.
Click the Status link for the work paper type in the Project Activity section.
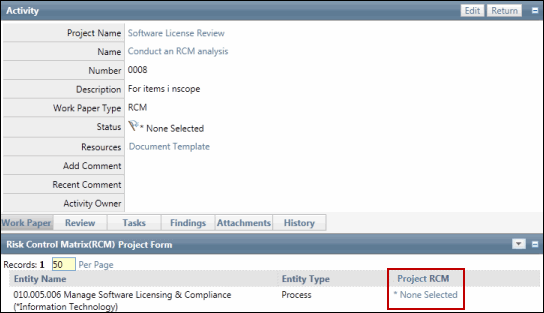
Click the status for the RCM work paper in the Risk Control Matrix(RCM) Project Form section.
Click the status of the auditable entity under the Project RCM column (e.g. organization, process, IT application, project/event or custom entity).
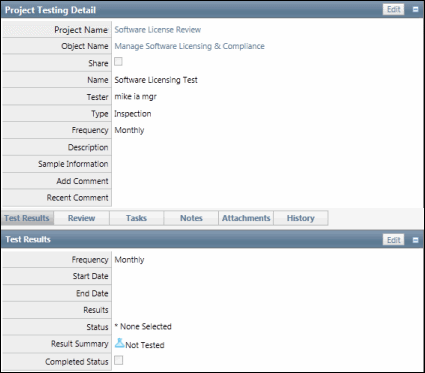
Click Edit next to the name of the test you wish to update in the Project Testing Details Evaluation section.
Note: Click Edit All to place all tests listed in edit mode at the same time. Make updates to multiple tests, then click Save All.
Enter data in the text fields, select an option from the drop-down lists (e.g. tester's name and test results summary) and click Calendar to select the test period start and end dates.
Click Save.
Note: Any additional notes, tasks or attachments may be added to the test via the available tabs.
There are several ways within the Governance Portal to access work papers. The two most common paths are through the Action Items List and the Internal Audit tab. The Action Item list is the quickest and easiest way for most users.
There are several ways within the Governance Portal to access work papers. The two most common paths are through the Action Items List and the Internal Audit tab. The Action Item list is the quickest and easiest way for most users.
Select the Default GRC context from the context menu.
Click the Projects tab.
Select Pending, Current, or Complete from the Execution group.
Click the project name from the project hierarchy tree.
Click Expand in the Project section to view the project attributes.
Click the Status link for the work paper type in the Project Activity section.
Click the Status link for a Testing Details work paper type.
Click the test name.
Click Edit in the Tests Results and Findings section.
Click Calendar and then click a date for the testing period start date.
Click Calendar and then click a date for the testing period end date.
Enter any test results and findings in the comment box.
Select the status of the testing from the drop-down list.
Select a testing summary from the drop-down list to describe your findings.
(Optional) Select the Completed checkbox to prevent any further updates to the test results. This will display as "True" after the updates have been saved.
Click Save.
Note: Any additional notes, tasks or attachments may be added to the test via the available tabs.
 Project RCM Evaluation.
  Edit next to the name of the test you wish to update in the Project Testing Details Evaluation section.
 Calendar to select the test period start and end dates.
  Save.
Save.