Add Attachments in the Project Workbench
- Access the object (projects,
 tests, work papers, tasks, or findings).
 - Click
 Attachments.
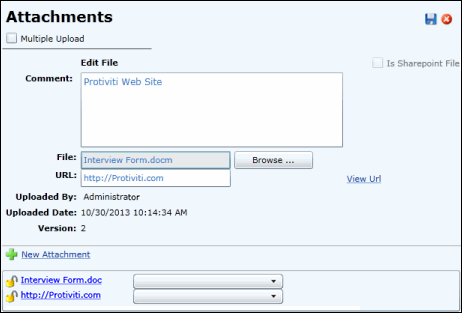
- Select the Multiple Upload check box if you wish to upload more than one file at once.
- Enter any necessary comments.
- Select the Is Sharepoint File checkbox if you wish to upload the file over the SharePoint server.
- Click Browse... to locate a file on your computer or server, or enter the URL.
Notes:
- The URL must be prefixed with a hypertext transfer protocol (i.e.: http://www.protiviti.com).
- You will not be able to enter a URL if you select the Is Sharepoint File checkbox.
- Click
 Save.
Save.Notes:
- Click
 New Attachment to save the existing attachment and open a blank screen to create a new one.
 - Click
 Lock to prevent other users from changing the attachment or
  Unlock to allow them to make changes.
- Click
